Garage Screen DIY Made Easy: Motorize Your Space
June 23, 2025
Buy 1 Get 1 50% OFF
Everything*
Request Free
In-Home Consultation
Transform Your Garage Into a Bug-Free Living Space
DIY motorized garage door screens are retractable mesh systems that convert your garage into a comfortable, pest-free outdoor living area with the push of a button. Here's what you need to know:
Key Components:
- Tubular motor hidden in aluminum housing
- Remote control and smartphone app operation
- Retractable mesh screen (insect, solar, or privacy)
- Side-zip tracks for secure seal
- Professional installation typically costs $2,800-$4,000
- DIY kits range from $600-$1,200
Installation Overview:
- Mount side tracks and header cassette
- Install tubular motor and wiring
- Program upper/lower limits
- Test operation and seal edges
Your garage doesn't have to sit unused when the weather's perfect but the bugs are out. One homeowner shared: "Having the Lifestyle Screen installed on my garage gave me the option of now using my garage for entertaining without the bugs!"
The numbers tell the story: A basic DIY garage screen starts around $50-$100, while motorized systems deliver serious convenience and can provide up to 65% protection from sun and heat. Professional installations run $2,800-$4,000, but a well-planned DIY project can slash those costs significantly.
Whether you want a bug-free workshop, an outdoor entertaining space, or just fresh air without the pests, motorized garage screens offer an instant solution. The retractable design means your garage door still functions normally, and modern motors integrate seamlessly with smart home systems.
I'm George Huizinga, founder of Zinga's, and over the past decade I've helped hundreds of homeowners improve their indoor and outdoor living spaces with custom shade solutions. Through my experience with DIY motorized garage door screens and professional installations, I've learned what works—and what doesn't—when it comes to creating these versatile living spaces.
, remote control operation, cost comparison between DIY ($600-$1200) vs professional installation ($2800-$4000), and key benefits like 65% heat reduction, bug protection, and smart home integration - diy motorized garage door screens infographic")
Basic diy motorized garage door screens terms:
What Is a Motorized Garage Door Screen & Why You'll Love It
Imagine pressing a button and watching your garage transform into a screened-in porch in seconds. That's the magic of Motorized Garage Screens—they create an instant outdoor living space that keeps bugs out while letting fresh air flow freely.
A motorized garage door screen is a retractable mesh system that mounts directly to your garage opening. When you don't need it, the screen disappears completely into a sleek aluminum housing. When you want to enjoy your garage as a comfortable outdoor room, the motor quietly unrolls the mesh, and side-zip tracks create a secure seal around the entire perimeter.
The beauty of these systems is their incredible versatility. You get UV protection and solar block capabilities, effective bug barriers, privacy options, and improved airflow—all in one neat solution. Unlike permanent screens that limit your garage's functionality, motorized versions retract completely when you need full access for parking or large projects.
How It Works: DIY Motorized Garage Door Screens
The heart of every DIY motorized garage door screen system is the tubular motor—a compact powerhouse that fits neatly inside the aluminum housing. This 24V DC tubular motor connects to a drive shaft, winding the screen fabric with remarkable precision. Built-in gear systems ensure whisper-quiet operation, while integrated limit switches prevent over-extension.
Remote and app control options make operation effortless. Many systems use Somfy RTS technology for reliable wireless communication, allowing you to control your screen from handheld remotes, wall-mounted switches, or smartphone apps. Smart home enthusiasts will love the integration possibilities with Alexa and Google Assistant.
Safety features give you peace of mind. Automatic obstruction stops prevent damage if something blocks the screen's path, while gear-override capabilities allow manual operation during power outages. The side-zip track system creates a weatherproof seal that completely eliminates gaps where insects could sneak through.
Benefits vs. Manual & Zip-Up Models
The convenience factor alone is game-changing. Manual screens require physical effort, often involving awkward reaching or ladder work for taller openings. With motorized systems, daily use becomes practical—no more leaving screens down because raising them is too much hassle.
Heat reduction delivers measurable comfort and energy savings. Quality solar mesh fabrics can reduce heat penetration by up to 65%, creating a noticeably cooler space. One satisfied customer shared: "I use my Lifestyle Screen year around to help keep my home cooler."
Child safety improves significantly with motorized systems. Manual zip-up screens often have cords or zippers at child height, creating potential hazards. Motorized screens eliminate these concerns while providing superior functionality.
The longevity advantage comes from controlled deployment and retraction. Manual handling inevitably leads to wear and tear—pulled zippers, torn fabric, bent frames. Motorized systems treat your screen gently every time, potentially extending its life significantly while maintaining peak performance.
Plan & Measure for DIY Motorized Garage Door Screens

Success with DIY motorized garage door screens starts with a tape measure, not a drill. I've watched too many eager homeowners order systems online, only to find their garage opening won't accommodate what they bought.
Start by measuring the inside width of your garage door frame at three spots—top, middle, and bottom. Use the narrowest measurement. Do the same for height, measuring from floor to header on both sides and in the center.
The header clearance above your door opening is crucial. Most motorized systems need 6-8 inches of clear space for the motor housing. The side clearance matters too—you'll need 3-4 inches on each side for proper track mounting.
Power planning often gets overlooked until installation day. Walk around your garage and locate the nearest electrical outlet. Most DIY motorized garage door screens run on standard 110V power and require GFCI protection for safety.
Your local environment shapes material choices. Wind exposure determines whether you need heavy-duty fabrics and reinforced mounting. Climate considerations matter too—salt air near coastlines requires corrosion-resistant hardware, while extreme temperature swings affect motor performance.
Don't forget the paperwork side. Most DIY motorized garage door screen installations don't require permits, but it's worth a quick call to your local building department. HOA rules can be trickier—some associations restrict exterior modifications, even retractable ones.
Choosing the Right Mesh & Housing
The mesh you choose transforms how your screen performs. Standard 18x14 fiberglass mesh works well for basic bug protection with excellent airflow. No-see-um mesh uses a finer weave that blocks tiny insects but reduces airflow by about 20%. PVC-coated polyester resists tears and UV damage better than fiberglass.
Solar protection levels make a real difference in comfort and energy bills. 80% solar block fabrics reduce heat while maintaining good visibility. 90% solar block provides significant heat reduction with moderate visibility, while 95% solar block delivers maximum heat protection but limits your view considerably.
Specialty options include crystal-clear vinyl for weather protection while maintaining excellent visibility, and privacy weave fabrics that block the view from outside while allowing you to see out.
The motor housing size depends on your screen dimensions. A 4-inch housing handles screens up to 144 inches wide, while larger openings require 5-inch or 6.5-inch housings. Choose housing colors that complement your garage door or trim for a professional appearance.
Tools, Materials & Cost Breakdown
Here's where the rubber meets the road—understanding what you'll actually spend on DIY motorized garage door screens versus having a professional handle everything.
Essential Tools You'll Need:
Your basic toolkit should include a drill/driver with bits, a 4-foot level (minimum), tape measure, and stud finder. Don't forget wire strippers, a voltage tester for safety, and protective gear like safety glasses. A step ladder or scaffolding becomes essential for larger garage openings.
Core Materials for Your Project:
The heart of your system includes aluminum side tracks, the motor housing with tubular motor, and screen fabric sized to your opening plus 6 inches for proper operation. You'll also need mounting hardware, anchors rated for your wall type, electrical components like switches and junction boxes, weather stripping for the bottom seal, and trim pieces for a finished look.
| Component | DIY Cost | Professional Cost |
|---|---|---|
| Single-car system | $600-$900 | $2,800-$3,200 |
| Double-car system | $800-$1,200 | $3,000-$4,000 |
| Custom sizing | +$200-$400 | +$500-$800 |
| Smart home integration | +$100-$200 | +$300-$500 |
The numbers tell a compelling story. DIY motorized garage door screens can save you $2,000-$3,000 compared to professional installation.
But here's what the simple math doesn't show—hidden costs that can sneak up on you. If your garage needs new electrical circuits, add $200-$500 for materials and potentially more for an electrician. Some areas require permits, and don't forget about tools you might need to purchase.
Plan for a full weekend, especially if you're installing on a double-car garage. Factor in your hourly value when comparing DIY versus professional installation.
Quality matters tremendously in this category. Motorized Screens for Garages from reputable manufacturers include comprehensive installation manuals, customer support, and warranty coverage that generic alternatives simply can't match.
The sweet spot for most homeowners? A DIY installation using quality components from established manufacturers. You get the cost savings of doing it yourself while maintaining the reliability and support structure of professional-grade materials.
Step-by-Step Installation Guide

Here's where we roll up our sleeves and turn that pile of parts into your dream DIY motorized garage door screens. I'll walk you through each step like I'm right there with you.
Starting with the side tracks sets the foundation for everything else. Using your careful measurements from earlier, mark exactly where each track will mount. Take your time with a chalk line for wider openings. Those tracks need to be perfectly plumb and parallel, or you'll fight binding issues forever.
When you're pre-drilling for anchors, the type of wall matters enormously. Concrete or block walls need masonry anchors rated for the weight load, while wood frame construction lets you hit the studs directly.
The header cassette installation is where having a friend pays off big time. This housing unit typically weighs 40-60 pounds and needs to sit perfectly level between your side tracks. Any sag here translates to a screen that binds during operation. Double-check that it's rock-solid before moving on.
Installing the screen roll and motor brings us to the electrical field. The screen fabric comes pre-attached to the motor tube, which slides into your cassette. The motor connections must follow the manufacturer's diagram exactly—incorrect wiring can fry your motor or create safety hazards. If you're feeling uncertain, this is absolutely the time to call in a licensed electrician.
The bottom bar and zip system keeps your screen taut and houses the zipper mechanism that seals into those side tracks. Attach it straight and ensure it has adequate weight—too light and the screen won't deploy smoothly, too heavy and you'll strain the motor.
Wiring the control system typically involves both high-voltage motor power and low-voltage control circuits. Most DIY motorized garage door screens use 110V for the motor itself, with separate low-voltage wiring for the control switch. Following local electrical codes isn't optional here—it's about safety.
Finally, programming the limits and testing transforms your hardware into a functioning system. You'll teach the motor exactly how far to extend and retract, setting both upper and lower stopping points.
Programming & First Run
Setting your upper limits starts with the screen fully retracted. Most systems use a combination of pressing the programming button on the motor while simultaneously hitting the "up" button on your remote. This upper limit prevents the motor from over-winding and damaging the screen fabric.
For lower limits, manually extend the screen to where you want it to stop—typically 1-2 inches above your garage floor to prevent dragging. Repeat the programming sequence using the "down" button.
Don't skip testing the safety features. Gently block the screen's path during operation to verify the obstruction reverse works properly. The motor should stop immediately and reverse direction.
Common Pitfalls & How to Avoid Them
Undersized screen fabric ranks as the top mistake. Always order fabric that's 6 inches wider and 2 inches taller than your opening. Tight-fitting screens bind in the tracks and wear out prematurely.
Warped or misaligned tracks create ongoing operational problems. Take the extra time to ensure your tracks run perfectly straight and parallel. Use a string line to check alignment over longer spans.
Electrical code violations can create safety hazards and problems during home inspections. Always use GFCI protection for garage installations and ensure your wire gauges match the motor's requirements.
Maintenance, Troubleshooting & Smart Upgrades

Here's the good news about your DIY motorized garage door screens—they're surprisingly low-maintenance once properly installed. Think of it like caring for a quality appliance: a little regular attention keeps everything running smoothly for years.
Quarterly care is really all you need. Grab your garden hose and give the screen fabric a gentle rinse to wash away dirt, pollen, and debris. While you're at it, wipe down the side tracks with a damp cloth and apply a thin coat of silicone lubricant to the track channels. This simple step prevents binding and keeps the screen gliding smoothly.
Don't forget to check that all your mounting hardware stays tight. Vibration from normal operation can gradually loosen screws and bolts, so a quick inspection with a screwdriver prevents bigger problems down the road.
Annual maintenance takes things a bit deeper. Inspect your electrical connections for any signs of corrosion or loose wires, especially if your garage gets humid. Test those safety features—the obstruction reverse and limit switches that protect your investment.
Smart upgrades can really improve your system's functionality. Battery backup systems let you operate your screen during power outages. Solar charging panels offer an eco-friendly power option. The Benefits of Motorization extend well beyond basic convenience when you add these thoughtful improvements.
Quick Fixes for Stuck or Noisy Screens
When your screen won't deploy, start with the basics. Check your power supply and those GFCI breakers—they're designed to trip for safety and are often the culprit. Look for debris in the tracks, especially after storms or when leaves are falling. Don't forget to check your remote battery—it's amazing how often this simple fix solves the "broken" screen.
If your screen operation sounds noisy, it's usually crying out for lubrication. Apply silicone spray to the tracks and motor housing, but avoid petroleum-based products that can damage the screen fabric. Check for loose mounting hardware that might be vibrating against the wall or ceiling.
Uneven deployment typically means your tracks aren't perfectly aligned anymore, or your bottom bar weight has shifted. Use a level to verify track alignment, and redistribute the bottom bar weight if it's bunched to one side.
Remote control problems are often the easiest to fix. Replace the batteries first—weak batteries cause intermittent operation that's frustrating to diagnose. If that doesn't work, re-pair the remote to the motor following your manufacturer's instructions.
Most problems we see stem from installation shortcuts or skipped maintenance rather than actual component failure. Quality tubular motors typically last 10-15 years with proper care, making them a worthwhile investment in your home's comfort and functionality.
Budget, Codes & When to Call a Pro

Here's the honest truth about DIY motorized garage door screens: sometimes the smartest DIY decision is knowing when to call in the pros.
When Electrical Work Gets Complex
If your garage needs new circuits or panel upgrades, that's electrician territory. The $200-$500 cost for proper electrical work beats explaining to your insurance company why your garage burned down. Most DIY motorized garage door screens work fine with existing outlets, but if you're running new wire through walls or dealing with older electrical systems, call a licensed electrician.
Structural Challenges That Demand Expertise
Older homes can surprise you. What looks like a simple mounting job might reveal rotted headers, unusual construction, or load-bearing concerns. A professional can assess whether your structure can handle the screen system plus wind loads without reinforcement.
Concrete block walls, steel frame construction, or unusual garage designs often require specialized mounting hardware and techniques that go beyond typical DIY skills.
Permit and Code Requirements
While most DIY motorized garage door screens don't require permits, some jurisdictions have specific rules about motorized installations. Coastal areas often mandate wind-rated requirements that can only be met through professional installation using certified mounting methods.
The ROI Reality Check
Let's talk numbers. DIY motorized garage door screens typically increase home value by $1,500-$3,000 while costing $600-$1,200 to install yourself. That's a solid return on investment within 3-5 years when you factor in energy savings and added living space.
Professional installations cost more upfront ($2,800-$4,000) but may take 5-7 years to reach break-even. However, they often come with comprehensive warranties and ongoing support that DIY installations can't match.
When Professional Warranties Matter
Professional installations typically include both product and labor warranties, plus ongoing service support. If your motor fails in year three, a professional installer handles the replacement at no charge. DIY installations usually void labor warranties, leaving you responsible for troubleshooting and repairs.
At Zinga's, we've built our reputation on helping homeowners make smart decisions about their outdoor living spaces. Our Motorized Screens installations come with the kind of support and warranty coverage that protects your investment long-term.
The bottom line? If you're handy with tools, comfortable with basic electrical work, and have a straightforward installation, DIY can save you serious money. But if you're dealing with complex electrical needs, structural concerns, or local code requirements, professional installation often proves cheaper in the long run.
Frequently Asked Questions about DIY Motorized Garage Door Screens
Let's tackle the questions we hear most often from homeowners considering DIY motorized garage door screens. These come up in nearly every consultation, so you're definitely not alone in wondering about these details.
How do I power the motor if my outlet is on the ceiling?
Ah, the classic garage outlet situation! Most garages have that single outlet mounted up near the garage door opener, leaving you scratching your head about how to power a screen motor down at opening level.
You've got a few practical solutions here. The extension cord approach works well if you choose a heavy-duty outdoor-rated cord and secure it properly. Run it along the ceiling and down the wall using cable clips—it's not the prettiest solution, but it's functional and costs under $30.
For a cleaner look, consider having an electrician install a new wall outlet near your motor location. Yes, it adds $150-$300 to your project, but you'll appreciate the professional appearance and convenience every time you use your screen.
Some newer systems offer low-voltage motor options that use a transformer near your existing outlet and run smaller gauge wire to the motor. This splits the difference between cost and appearance—definitely worth asking about when shopping for your system.
Can the screen operate during a power outage?
This question usually comes up right after someone experiences their first power outage with a deployed screen! Standard motors won't budge without electricity, but manufacturers have thought about this scenario.
Gear-override motors are your best bet for power outage flexibility. These systems include a manual crank that inserts into the motor housing, letting you raise or lower the screen by hand. It takes a bit of effort, but you won't be stuck with a screen deployed during a storm.
For the tech-savvy homeowner, battery backup systems provide several hours of normal operation during outages. Some manufacturers even offer solar charging panels that can keep your battery topped off indefinitely—pretty neat if you're into sustainable solutions.
Most of our customers find that gear-override capability handles their needs perfectly. After all, how often do you really need to operate your screen during a power outage?
Will a motorized screen work with my existing garage door opener?
Absolutely! This might be the most common worry we hear, and it's completely unfounded. DIY motorized garage door screens work independently from your garage door system—they're like having two separate appliances that happen to share the same opening.
The key is proper clearance planning. When your screen retracts into its housing, it needs to stay out of your garage door's travel path. Most systems require 6-8 inches of clearance above the door opening, which works fine with standard garage door configurations.
Here's where it gets interesting for the smart home enthusiasts: some systems can coordinate operations automatically. Proximity sensors can detect when your garage door starts opening and automatically retract the screen. Voice assistants can control both systems with commands like "Alexa, open the garage" if you set up the integration properly.
But honestly? Manual coordination works perfectly for most homeowners. You simply retract the screen before opening the garage door—it becomes second nature after the first week of use.
At Zinga's, we've installed hundreds of motorized screens alongside existing garage door systems without a single compatibility issue. The beauty of these systems lies in their independence—your garage remains fully functional while gaining the bonus of screened outdoor living space.
Conclusion
Your garage has been waiting to become more than a parking spot. With DIY motorized garage door screens, you can turn it into a breezy workshop, a bug-free lounge, or an extra entertaining zone in a single weekend.
A quality kit ($600–$1,200) plus a little sweat equity delivers the same comfort and convenience that usually costs $2,800–$4,000 when hired out. Measure carefully, follow the instructions, and call a licensed pro for any wiring you’re not 100 % comfortable handling—simple steps that guarantee a smooth install and years of trouble-free use.
At Zinga’s, we’ve guided hundreds of homeowners through this change. Whether you tackle it yourself or prefer our white-glove service, we’re here with expert advice, premium components, and the customer care that defines our brand.
Ready to reclaim your garage? Explore all the options and book a free in-home consultation here: More info about motorized screen services.


Recent Posts
Wood vs Composite Shutters in Humid Climates: Which Holds Up Better?
Why Your Motorized Blinds Stutter or Stall: Troubleshooting 5 Common Failures
Thermal Performance Showdown: Cellular Shades vs Roller Shades
Categories
Download our Motorized Pergola Guide
Looking for inspiration? Download our free feature packed pdf and see what all options you can get in your pergola.
Table of Contents
- Transform Your Garage Into A Bug-free Living Space
- What Is A Motorized Garage Door Screen & Why You'll Love It
- How It Works: Diy Motorized Garage Door Screens
- Benefits Vs. Manual & Zip-up Models
- Plan & Measure For Diy Motorized Garage Door Screens
- Choosing The Right Mesh & Housing
- Tools, Materials & Cost Breakdown
- Step-by-step Installation Guide
- Programming & First Run
- Common Pitfalls & How To Avoid Them
- Maintenance, Troubleshooting & Smart Upgrades
- Quick Fixes For Stuck Or Noisy Screens
- Budget, Codes & When To Call A Pro
- Frequently Asked Questions About Diy Motorized Garage Door Screens
- How Do I Power The Motor If My Outlet Is On The Ceiling?
- Can The Screen Operate During A Power Outage?
- Will A Motorized Screen Work With My Existing Garage Door Opener?
- Conclusion
What Products Are You Interested In?


Shades Made Simple.
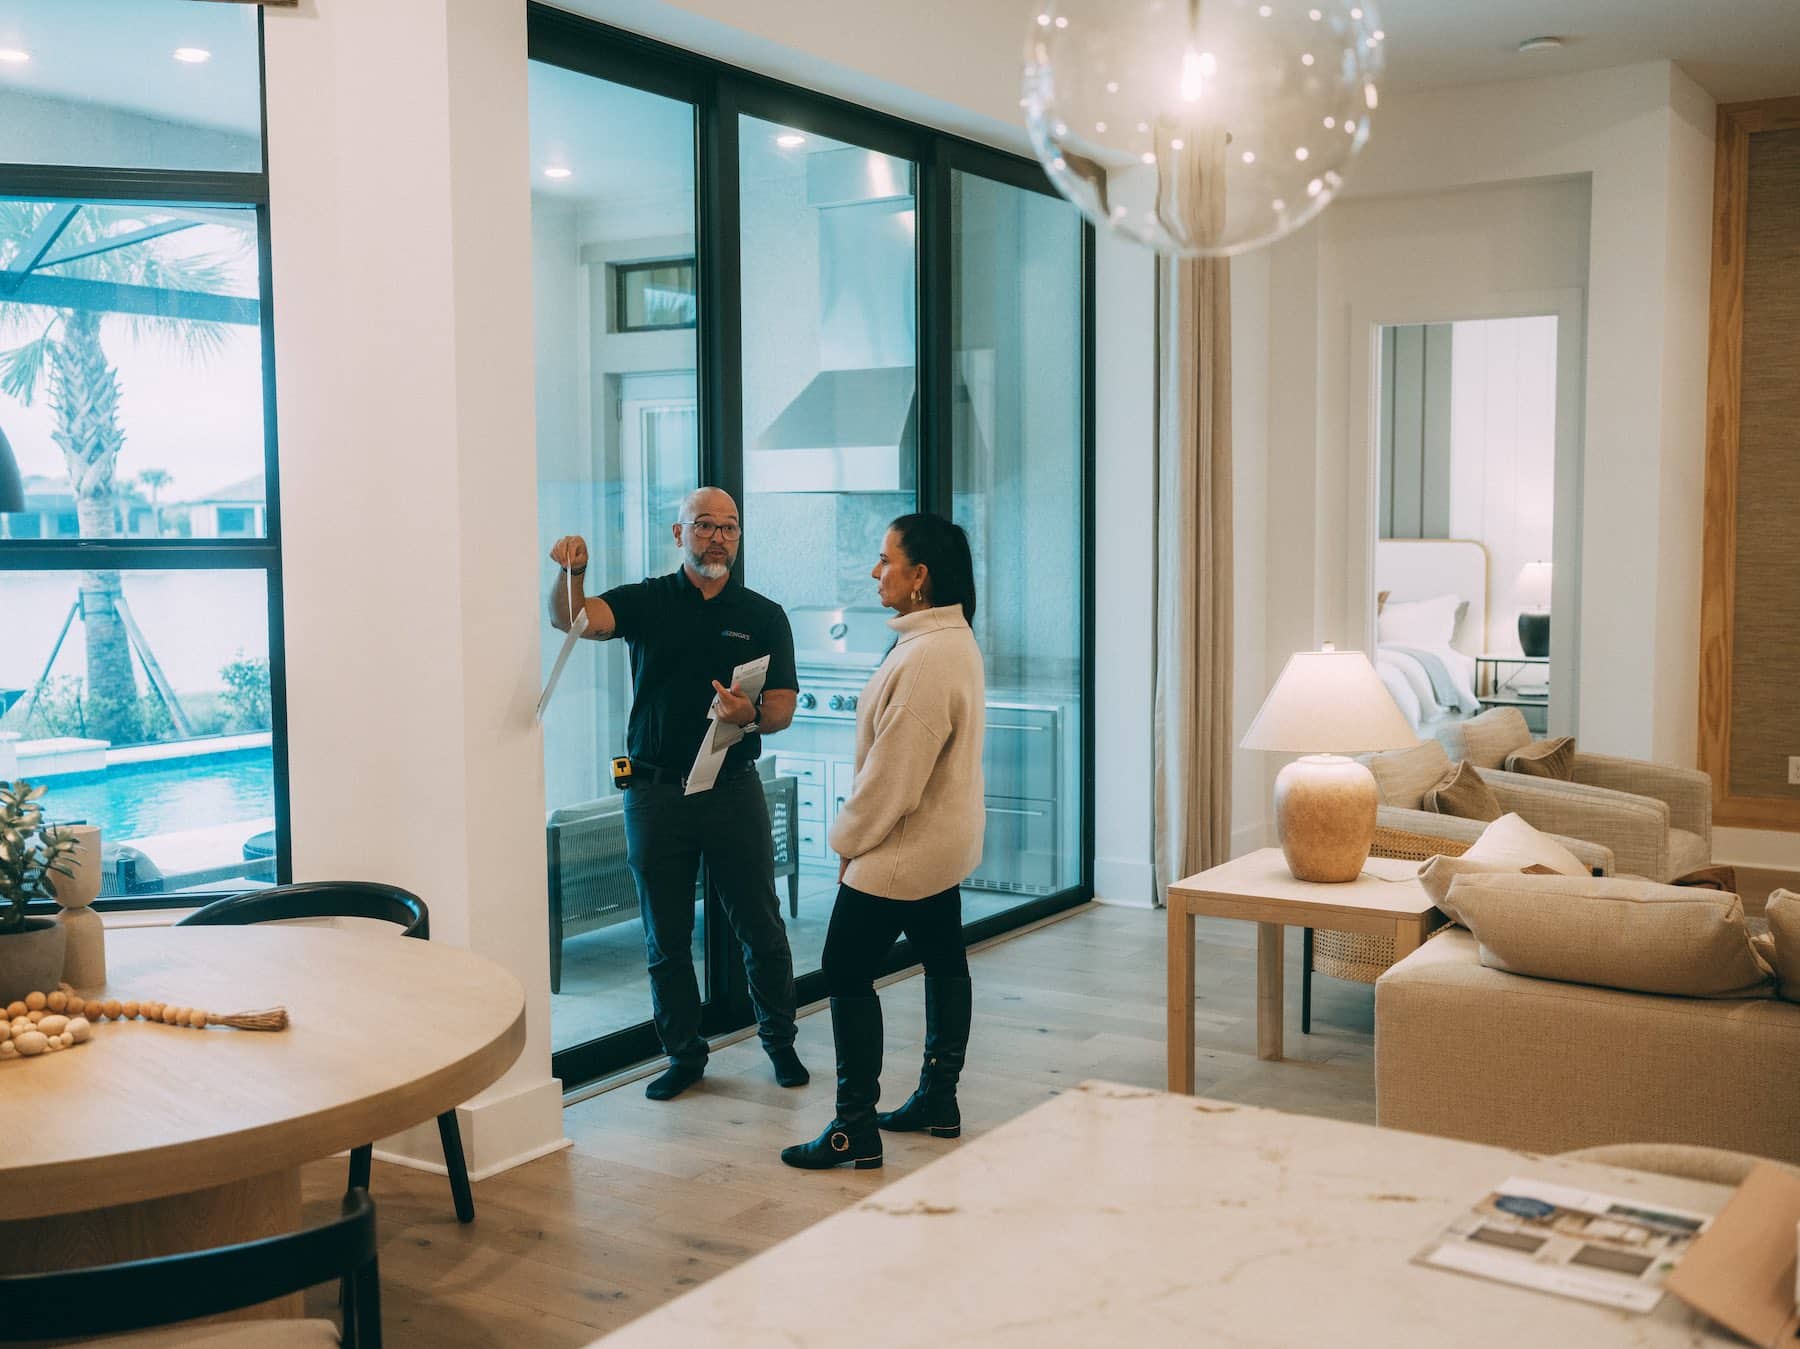
STEP 1: Complimentary In-Home Consultation
We bring sample products & fabrics directly to your home so you can see and feel the products in your home.
STEP 2: Precise Measuring & No Pressure Quote
We take precise measurements of all your windows and provide you a no pressure quote at the time of your consultation.
STEP 3: Hassle Free Installation
Installation completed by Zinga's employee who are experts in their craft. Free yourself of the stress of installing.
Building a Home?
Building a home can be stressful enough, let us take the burden of window treatments off your hands. We will meet with you after your drywall is complete and can install as soon as you move in!


Who Is Zinga’s?
Zinga’s has been offering window treatments for 25 years and has grown 25% year over year! How did we do that? Simple, we’ve put our customer first. We genuinely love our customers and giving them great service. We want to wow our customers and when you wow your customers they give great referrals. See our over 2000+ reviews, our customers speak for themselves!
Learn More About Zinga's
A Reputation You Can Trust.